Introduction to Recording Drums
Ribbon microphones excel on drums. They have an extremely natural sounding pickup, capturing the power, tone and nuance of all components of the kit. One Royer stereo ribbon mic on drum overhead gives an amazing image of the kit, with fast transient response and the added advantage of handling EQ beautifully. Today, engineers are using Royer ribbons all over the drum kit and as room mics. See examples below.
Minimalist Miking
Many legendary drum recordings were made with few mics on the kit, capturing full kit sound and minimizing phase issues due to interaction between many close microphones. Legendary Beatles recordings had a Coles 4038 ribbon mic overhead, an AKG D19 on the snare and an AKG D20 in front of the kit – the classic Ringo sound. Old Motown records employed similar minimal miking techniques; since many of the sessions were done live with the musicians in one large room, minimal miking was necessary and it helped reduce leakage. Eddie Kramer used three or four mics on John Bonham’s kit on some of the biggest sounding Led Zeppelin’s tracks. There’s no arguing with sound that good! Minimal miking is a great place to start.
Simple Setups:
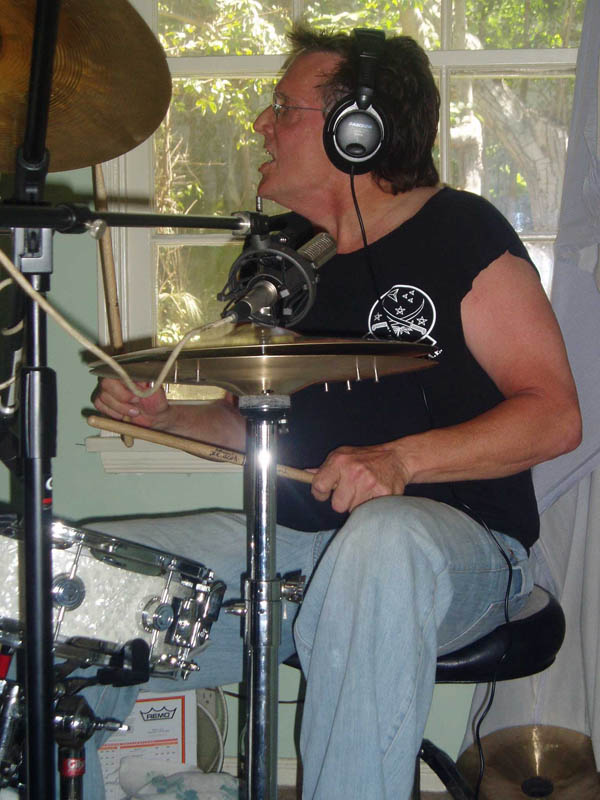
MONO – Place one R-series mic 5 feet in front of the kit (closer or further depending on the size of the room), waist high. Add compression – maybe an 1176 or Distressor. Done.
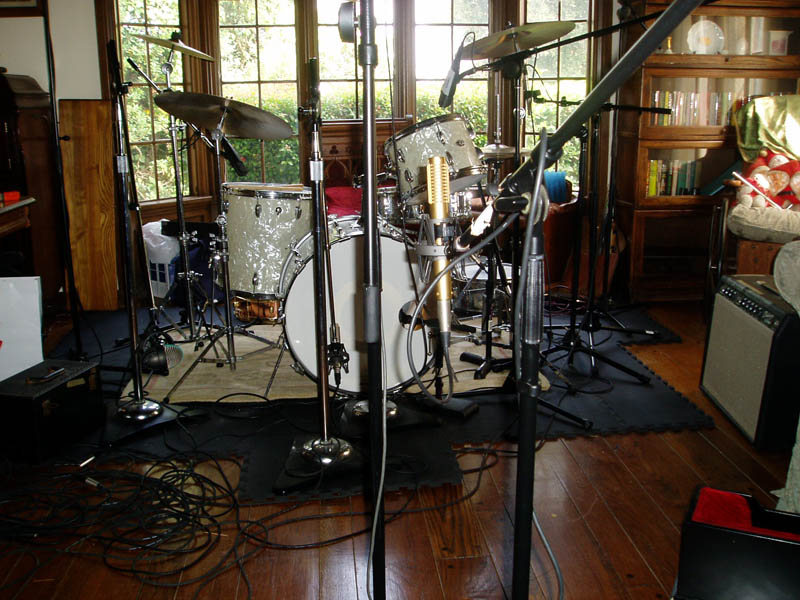
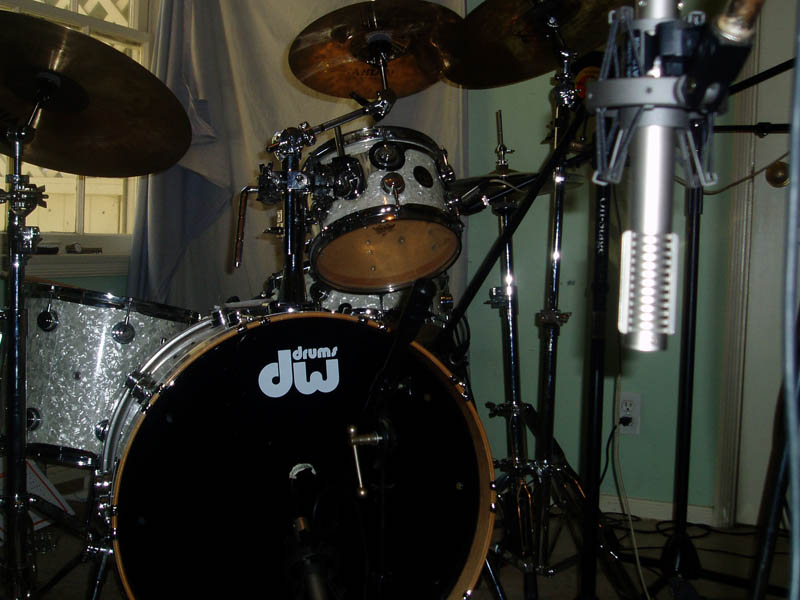
R-122 in front of kit in home studio
STEREO – An overhead stereo ribbon mic gives an extremely realistic picture of any drum kit. Point the logo at the snare to center the snare in the stereo field. The L-R imaging is excellent and the drums record very much like what the drummer is hearing. Due to the realistic sound pickup, cymbals won’t be as bright as with condensers. Opening up the higher frequencies with EQ will give the cymbals more sparkle and cut without affecting the pickup of the rest of the kit.
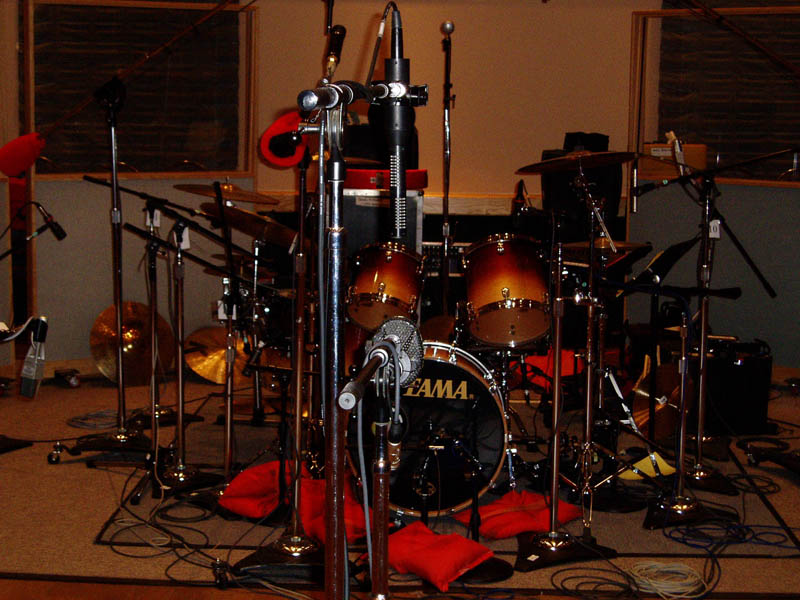
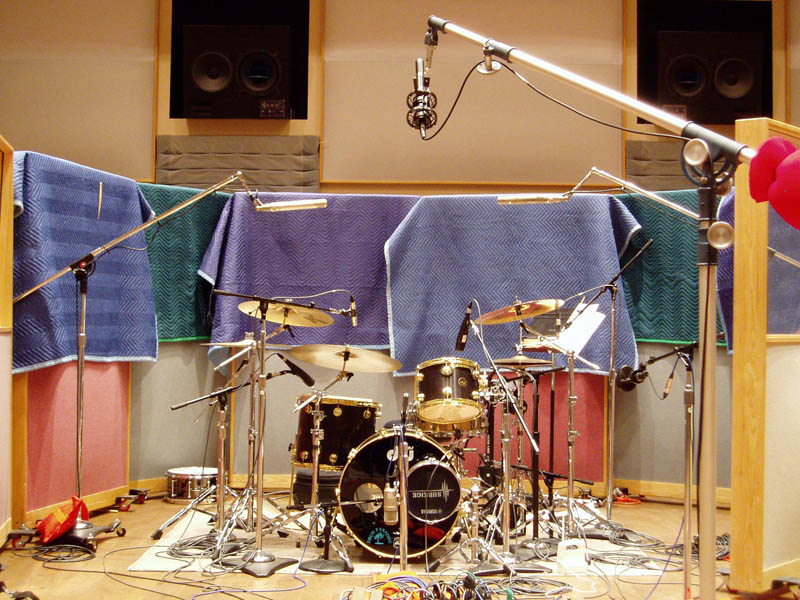
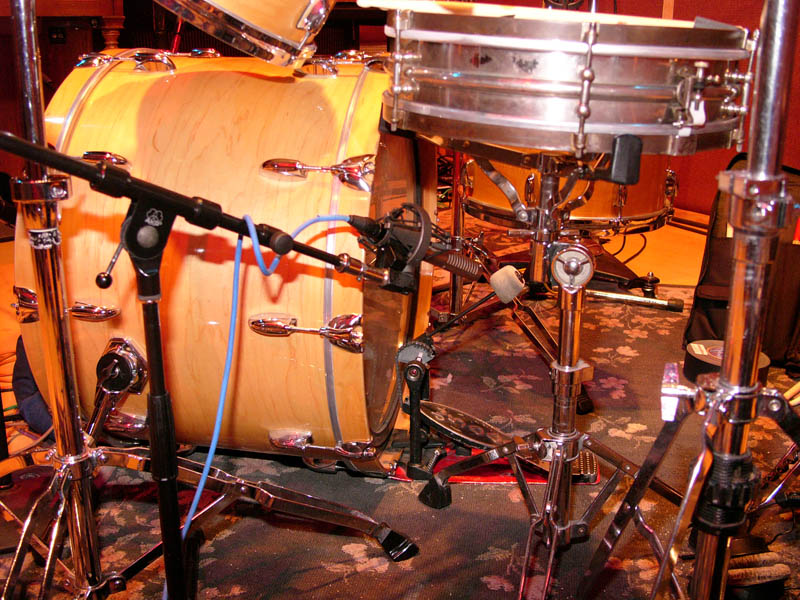
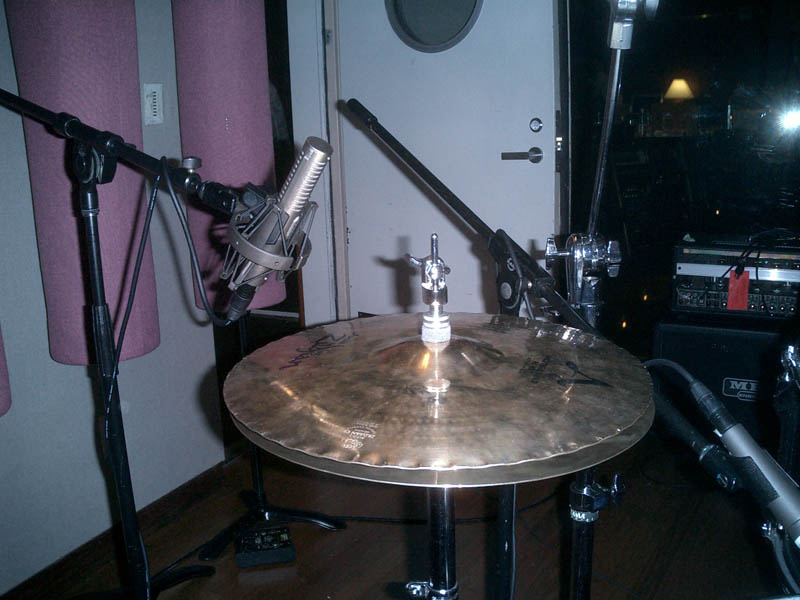
Place an SF-12 or SF-24 over the kit and an R-121 or R-122 about 1 foot off the front kick drum head, angled 45 degrees toward the drum (this protects the ribbon elementand reduces kit bleed into the kick drum mic). Adjust positions of the two mics for desired ratio of kit to room sound.

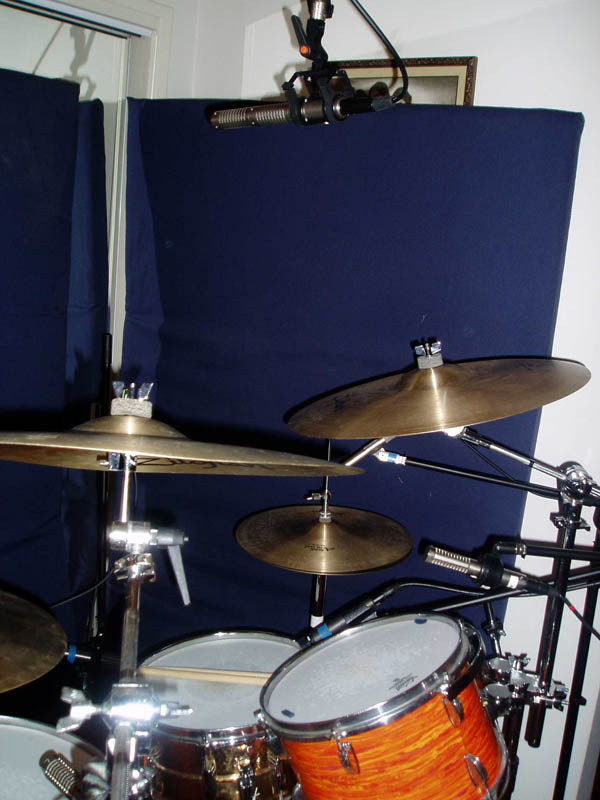
If the ceiling is low and you have too much ceiling reflection getting into the back side of the mic, move the mic toward the front or the back of the kit and angle it at 45 degrees. This picture of an angled SF-12 is from a session Al Schmitt recorded. The low ceiling of the isolation booth was dealt with by angling the mic.
Overheads
Minimilist miking is good for some things, but most engineers today use a number of mics on the kit and at least a pair of mics in the room. Here we’ll look at miking the drums on a more individual basis and show you how a number of engineers use their Royers.
A great place to start is with the overheads, as they establish the imaging and the natural balance of the kit. Your overhead mics can be spaced closely or spread out for a wider stereo image. The R-122 is excellent for drum overheads – engineer Bruce Swedien’s favorite overhead mic setup is a pair of R-122 phantom powered ribbons. For Omar Hakim’s kit, Bruce used a pair of R-122’s for overheads, an R-122 on the ride cymbal and an R-121 on high hat.

Elliot Scheiner also uses R-122’s for drum overheads. This pic of the kit was taken during a Jane Monheit session.

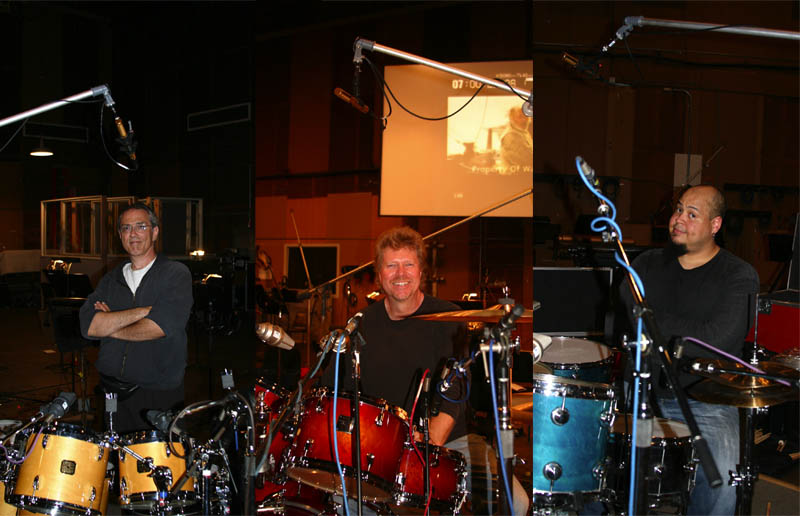
Mono overhead miking can be very effective. To capture a “cannibal vibe” in Pirates of the Caribbean 2, Alan Meyerson put one R-122V tube ribbon mic over each of three kits on the Sony scoring stage in LA. The drummers – Vinnie Colaiuta, JR Robinson and Abe Laboriel Jr. – played together simultaneously.
.
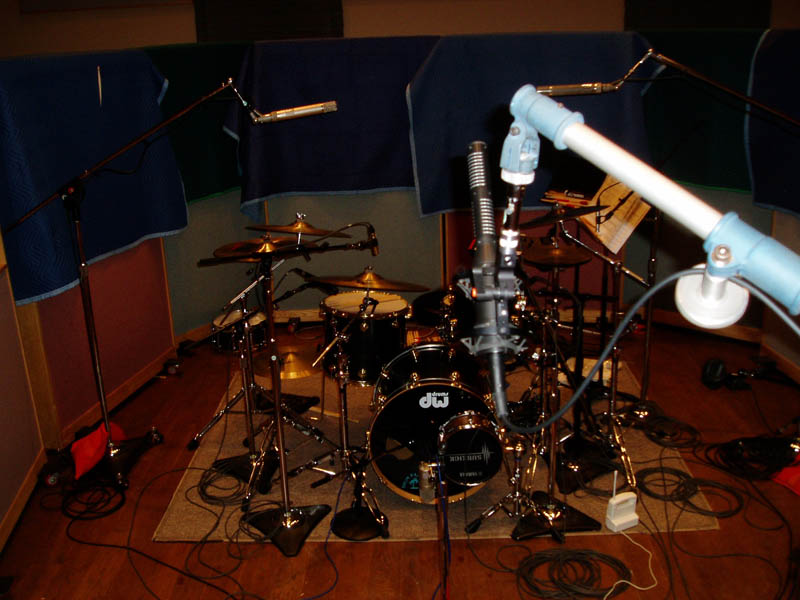
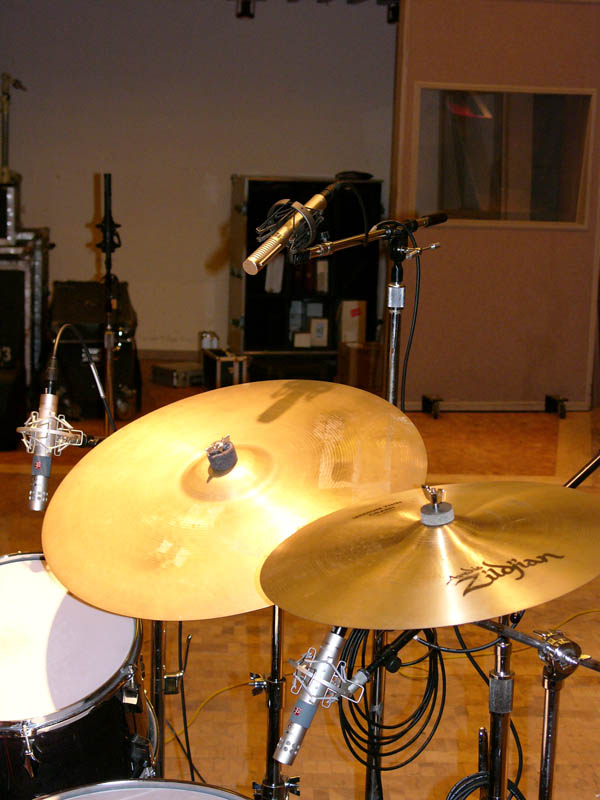
The stereo SF-12 and SF-24 are perfect for single point X-Y stereo miking, capturing the kit in perfect stereo without any phase cancellation. Pointing the microphone’s logo at the snare drum centers the snare in the stereo image. Moving the mic higher and lower can make a lot of difference, giving the kit an immediate, punchy sound (close) or a more open ambient sound (further).


SF-12 for drum overheads on The Dirty Dozen
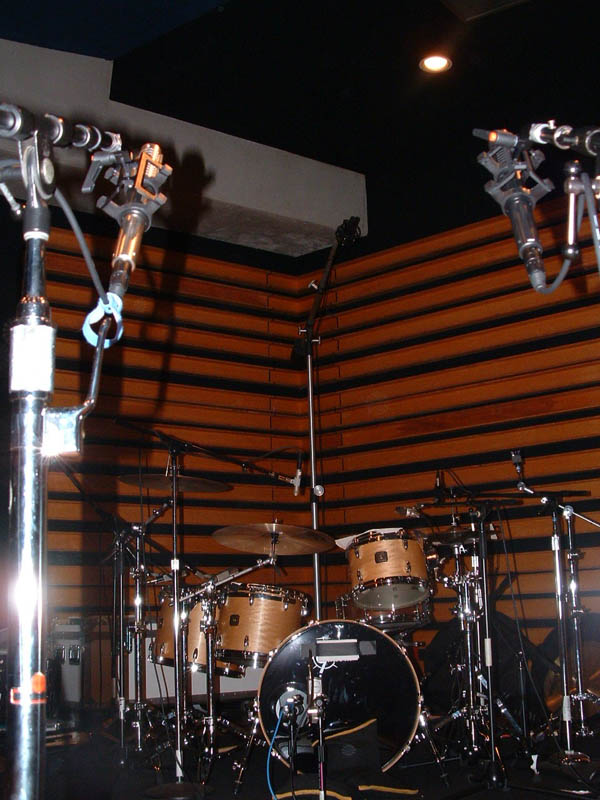
SF-24 for overheads on Train, being recorded by Don Gilmore. Notice the high ceiling at NRG Studios, which allowed for higher placement of the microphone without ceiling reflections.
Room Mics – Front of Kit
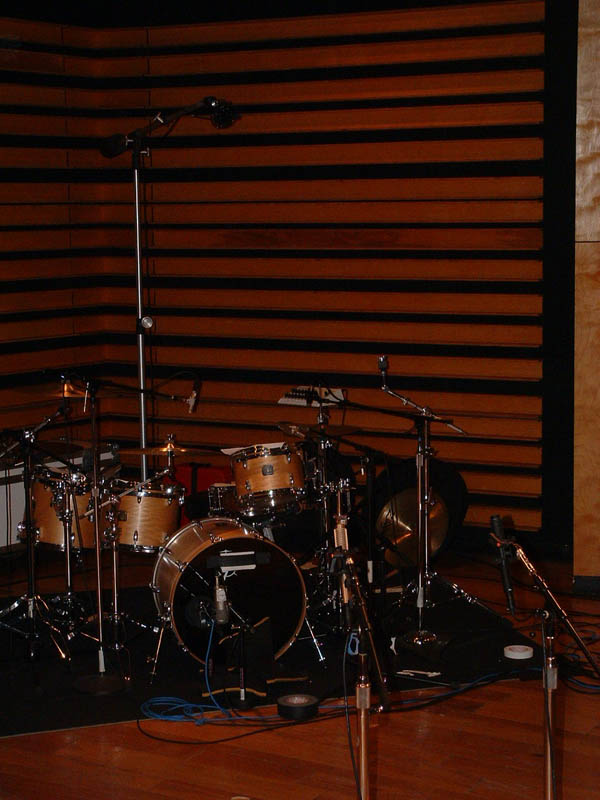
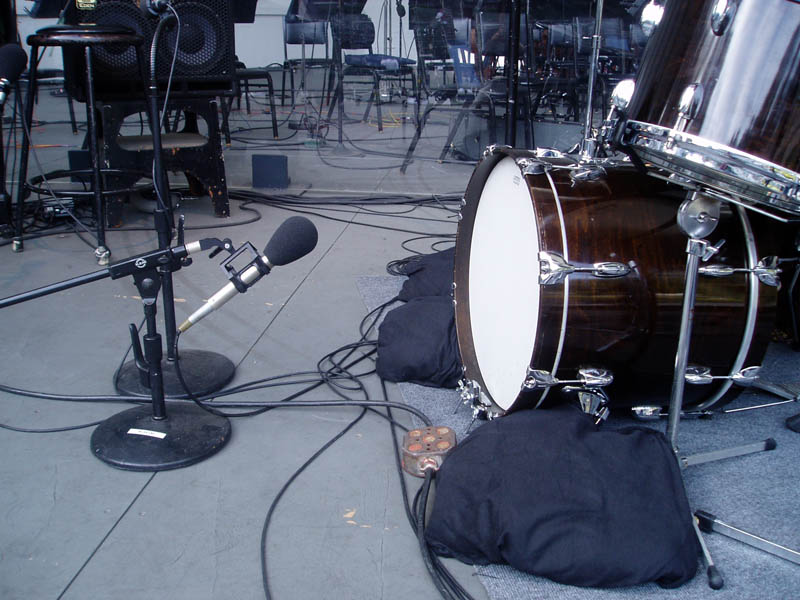
It’s a great idea to use one or two mics in front of the kit; after all, that’s usually how we listen. Here are a couple of options:A single R-series mic 3-4ft. high about 4ft. in front of the kick. This will pick up the overall sound of the kit and can support your other tracks nicely – compress this mic to stun to add hugeness and compressor pump. Here is Richie Hayward’s kit miked up for a home recording. This method also works very well in large rooms.
An SF-12 or SF-24 stereo mic placed 3-4ft. high, 4-8ft. in front of the kick generates a nice stereo image.
Kenny Aronoff’s kit miked by Ross Hogarth- SF-24 in front of the kit with a Coles 4038 ribbon mic under it.


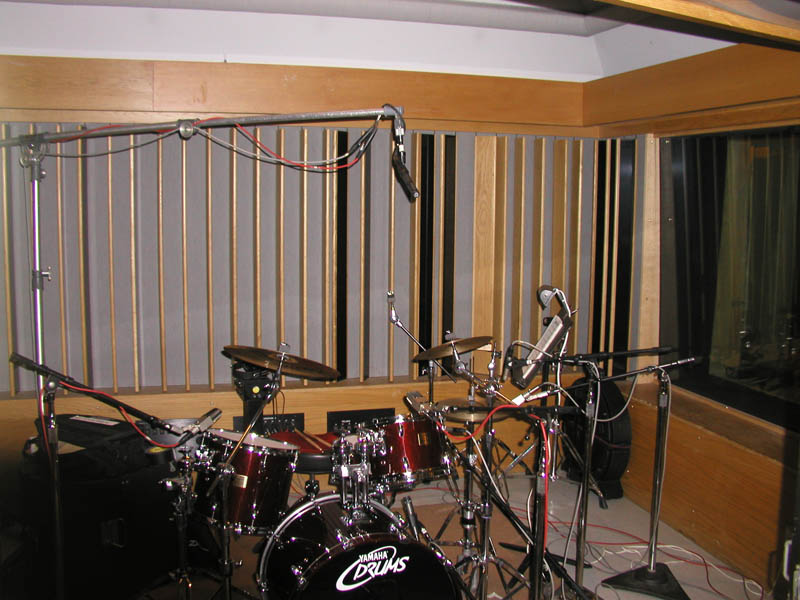
Engineer Steve Kempster’s setup – SF-24 8 feet in front of the kit, R-122’s overhead, R-122 on ride cymbal.
Now try the same position with the SF-12 or SF-24, but 6-8ft high. Engineer Steve Churchyard’s mic setup on a Meatloaf Bat Out Of Hell 3 session.
A pair of R-series ribbons split tight or wide in front of the kit as room mics.

Drums set up in Chuck Ainlay’s studio with R-122’s split out wide.
R-122’s close together in the room on a Train session, with an SF-24 overhead.
Toms
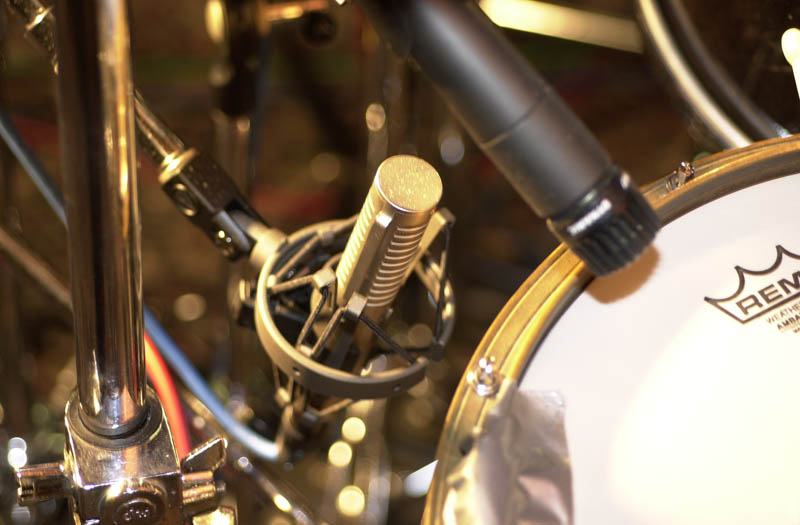
R121s and R122s both sound great on toms! Position the mic at a 45 degree angle, pointing at the center of the drum, making sure to leave enough room for the drummer’s sticks. Here’s another Bruce Swedien setup with R-121’s on toms and high hat.
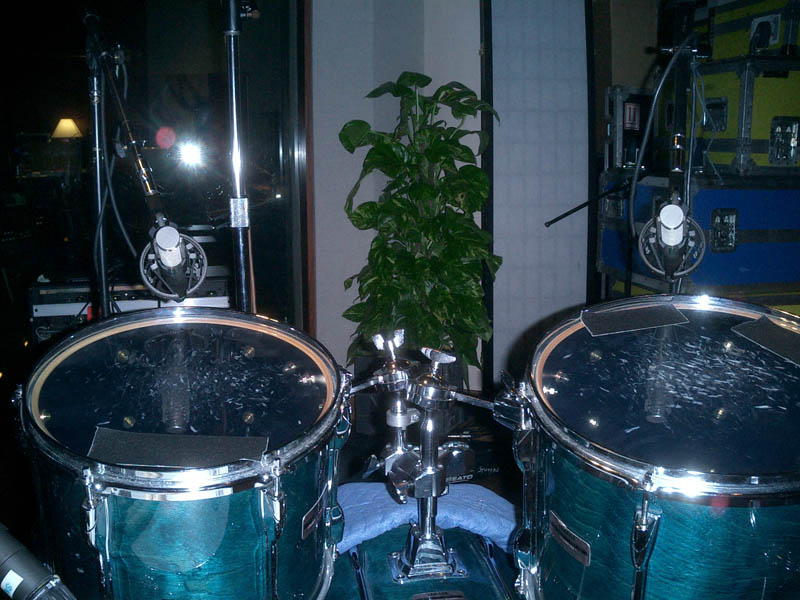

Sean Beavan’s drums with R-121’s on toms and kick, SF-12 overhead.
Kick Drum
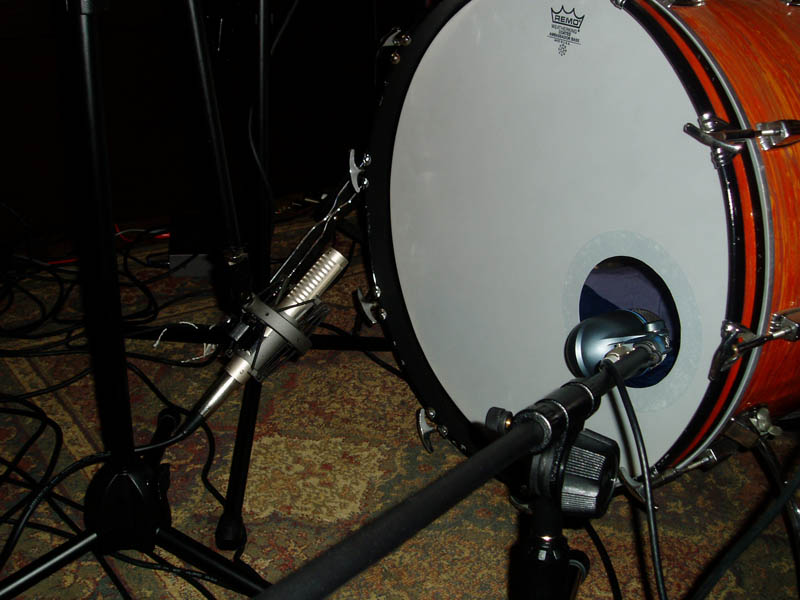
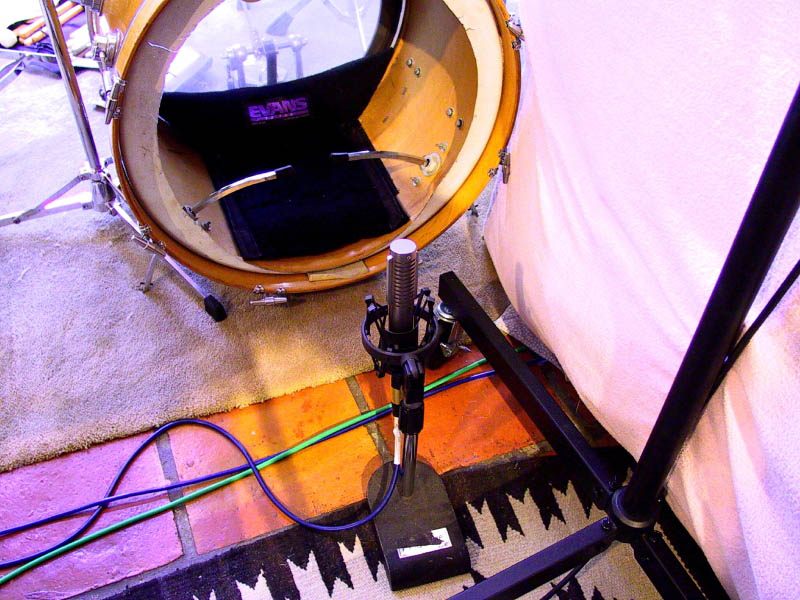
For a modern sound, combine an R-121 with a dynamic mic. Angle the R-121 downward at 45 degrees, and position it 10-14 inches from the kick drum head. To protect the ribbon from blasts of air, be sure to position the mic away from any holes cut in the head. The 45 degree angle protects the ribbon element by allowing it to take the low frequency, high SPL kick drum impact unevenly down the length of the ribbon, letting the ribbon flex without stretching it out. The sound of the R-121 in this position has often been compared to a FET-47. Add a dynamic mic, such as a D-112, 421, or even an SM57 placed inside the drum, to pick up the attack of the beater. Balance to taste!
Important Note:
Royer R-series ribbons have excellent side rejection which extend to the top and bottom sides of the mic as well. If you were to talk into the null points (the ribbed sides) of an R-121 or R-122, or directly at the top or bottom of the mic, you would hear next to nothing. This pattern is extremely useful for rejecting unwanted sounds in your recordings. Because the top of the mic is a null point, leaning the microphone forward – which points the top of the microphone directly at the rest of the drum kit – gives you a well isolated kick drum, almost as if you had a blanket over the kick and the mic for isolation.
For a more “vintage” sound, skip the dynamic mic. Brian Blade’s live drum miking – R-122 on kick, R-121’s on overheads, R-121 on high hat.

Position the mic a little further back for a nice jazz kick drum.
Snare
Although ribbon mics sound great on snare drums, they’re a bit tricky to use without endangering the ribbon mic. Here are some tips:
Place an R-series mic underneath the snare with the rear of the mic facing the snares and front of the mic facing the beater side of the kick drum. Remember to flip phase with this mic so it will be in phase with the top mic as well as with the front kick mics. Compress to taste! This is engineer Dusty Wakeman’s snare drum setup.

This snare is from an MXPX session, produced by Dave Jerden.
For a jazz or vintage setup, place an R-series with the front facing the snare and the back toward the hi-hat (remember, ribbons are bi-directional).
Hi-hat
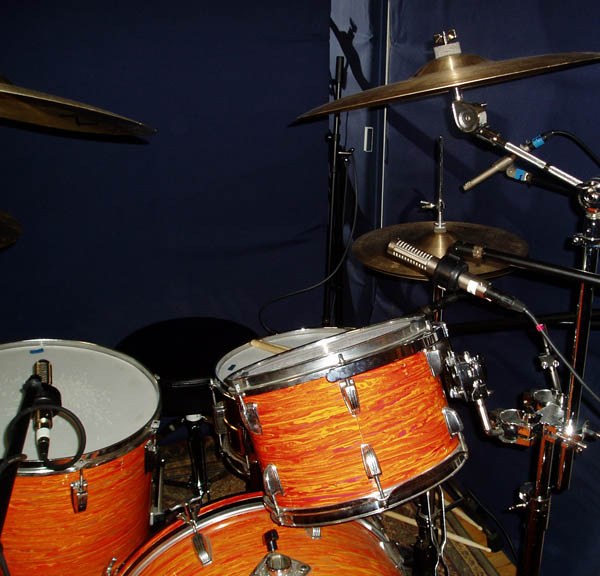
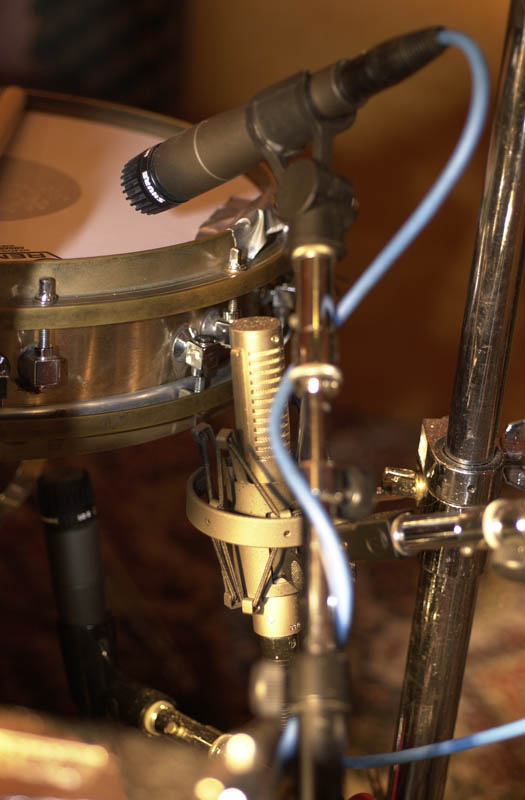
R-series mics are wonderful on hi-hat and can handle all the hi-freq eq boost that you can throw at them. You can get all the sizzle you need without the sound getting grainy or harsh, or leave the track non-EQ’ed and have a warm, natural high hat. Place at a 45 degree angle and leave room for those drum sticks. This is Bruce Swedien’s high hat miking technique.
Richie Hayward’s kit on a home recording session.
Ride Cymbal
Sometimes it’s a good idea to close mic the ride cymbal, just in case you find you want to bring out some detail in the mix without affecting the overall drum balance. It’s better to print it and not use it than to need it and not have it. Ride cymbal miking on a session engineered by Steve Kempster.
Cymbals
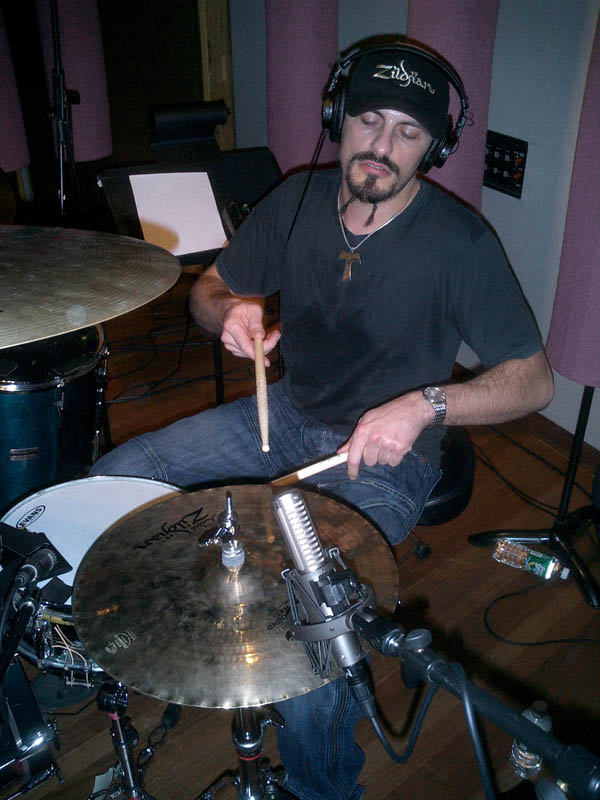
Here’s a great technique that might come in handy. Place an R-series mic between the cymbals, pointing the front toward the ride cymbal and the back toward the crash cymbal. The mic should now be at a 90 degree angle to the floor. Ribbon mics are bi-directional, picking up to the front and to the back. A bonus is that they have a strong null-point to the sides. In this configuration, you can get a lot of cymbal coverage without much snare. Try it – you’ll be amazed.